OSL Scripting - Meat Material Breakdown
- Feb 19, 2022
- 3 min read
Updated: Jul 7, 2025
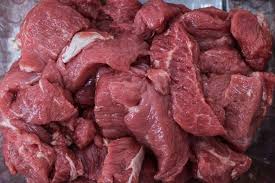
Applied Meat Material Examples:

References


The Code

In Houdini, OSL code must be placed into an OSL node (Text mode, compiled) within a material. This codes' outputs are placed as demonstrated in the upper screenshot, with an additional bump map to provide a meaty texture.

shader MeatShader( //Color A ATTRIBUTES color Color_A = color(0.967,0.504,0.496), float noise_ampA = 0.634 [[float min = 0.5, float max = 3]], //coior/intensity float noise_freqA = 15.3 [[float min = 0, float max = 100]], float sharpValA = 29.73 [[float min = 0, float max = 50]], //sharpness //Color B ATTRIBUTES color Color_B = color(0.5744890,0.0274889,0.0344889), float noise_ampB = 1.067 [[float min = 0.5, float max = 3]], //color/intensity float noise_freqB = 4.8 [[float min = 0, float max = 100]], float sharpValB = 1.05 [[float min = 0, float max = 50]], //sharpness //Extra Features float OverallObjRefl = 1 [[float min = 0, float max = 1]], // texture sharpness float ObjReflContrast = 1 [[float min = 0, float max = 1]], // texture sharpness float DispVal = 0.221 [[float min = 0, float max = 2]], //sharpness int animSwitch = 0 [[string label="Anim OFF/ON",int min = 0, int max = 1]], //turn animation on/off float speed = 0.5 [[string label="Anim Speed",float min = -1, float max = 1]], //animation speed //Greys output color Result = 0.5, output color disp = 0.5, output color rough = 0.5, output color SS = 0.5, //SubSurface color SS_Color_A = color(0,0.369,0.0210857), color SS_Color_B = color(-0.145667,0.0873333,0.0583333), ) { color noiceA = sharpValA*(mix(1.0, noise("snoise",(transform("object",P) * noise_freqA)+(time*speed*animSwitch)), noise_ampA)); color noiceB = sharpValB*(mix(1.0, noise("snoise",(transform("object",P) * noise_freqB)+(time*speed*animSwitch)), noise_ampB)); color myNoise = clamp(noiceA[1]*noiceB[0], 0,1); Result = (Color_A*myNoise + Color_B*(1-myNoise)); disp = DispVal*myNoise; rough = 1-(OverallObjRefl * (myNoise + ObjReflContrast)); SS = (SS_Color_A*myNoise + SS_Color_B*(1-myNoise)); }
The output sliders in this code are preset to the central meat example. The UI is divided into colors A and B, which have color pickers and 3 sliders each: Amplitude (noise_amp) is the intensity of noise. Frequency (noise_freq) is the size amount of times the noise repeats itself. Sharpness (sharpVal) is the transition intensity at the edge of the noise. The provided SubSurface colors should generally be unadjusted, but it should noted that adjusting the SS colors' brightness is a way of the overall section's value. There is an option to animate the displacement over time and a slier to toggle it off/on as well as adjust the speed of the displacement's transition.
Progression

While learning OSL and building on the course of previous knowledge many various shaders were created. This timeline demonstrates the visual progression of my OSLs - from mixing two colors over with a normalized float to several outputs and the creation of the Meat Material OSL. The most discouraging limitation was that of very few simple, imputable noise types. The most easily accessible were snoise, noise, and cell noises. One interesting issue that was encountered was the inability to create a bump map through OSL code (2022). The options were to plug in noise separately from the OSL code—through a noise maker or to add an extra layer to the displacement mask (not recommended).
OSL Code for Displacement on Displacement:

If you'd like to play around with displacement on displacement configure these parts to your code: TOP PART: //DISPLACEMENT NOISE output color The_DispNoise = 0.5, output color Disp_Wih_DispNoise = 1, float DispNoise_amp = 0.5 [[float min = 0.5, float max = 3]], float DispNoise_freq = 0 [[float min = 50, float max = 1000]], float DispNoiseVal = 0.5 [[float min = 0, float max = 50]], BOTTOM PART: //DISPLACEMENT NOISE color DispNoise = DispNoiseVal*(mix(1.0, noise("noise",(transform("object",P) * DispNoise_freq)+(time*speed*animSwitch)), DispNoise_amp)); //(myNoise+DispNoise_amp) = clamps noise range down The_DispNoise = DispNoise; Disp_Wih_DispNoise = clamp((myNoise+DispNoise_amp),0,1)*(The_DispNoise+disp); //Disp_Wih_DispNoise = clamp((myNoise+DispNoise_amp),0,1)*The_DispNoise; If there is an output for displacement, this code will add the option to view and adjust: Displacement Noise (The_DispNoise) Displacement Noise on top of Displacement (Disp_Wih_DispNoise) Simply plug these into displacement to see and adjust their appearances until desired effect is achieved.
BONUS! Combining Newtons Cradle Generator with Meat OSL:
As an Open Shading Language, OSL is loadable in not just Houdini, but other renderers and 3D packages such as Maya, 3ds Max, and Blender. I took the created OSL code and plugged it into the Python code I wrote for Maya.
I connected the outputs into an aiStandardSurface shader and made the shader parameters customizable at object level.
Here is the file for download: