Motion Capture, Shogun, and My Auto-Cleanup Script Creation Process
- Jan 30, 2023
- 3 min read
Updated: Jul 6, 2025
The Script
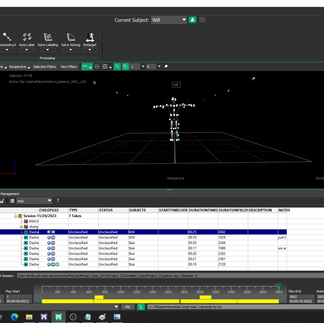
One of the first run-throughs of the post-process cleaning with script:


I have been a member of the Motion Capture club since my freshman year. Though I have become the club Secretary and thoroughly learned how to capture data and work with the motion capture room it took until my last half-year at SCAD for the motion capture class to be offered. In this class I learned how to clean up motion capture data in Shogun Post and how to apply the data to a rig in Maya.
This Shogun Post motion capture cleanup method was taught to me by the Motion Capture Club VP, Ken Blocker, an animator who worked on The Finial Dungeon as a co-director.
The section of the script which does post-process cleaning happens in seconds and the timeline doesn't update to show the before and after of this section of the script when running. When done manually, the cleanup shown above can take up to half an hour to produce.
Cleanup happens after the motion capture data runs through Reconstructing, Auto-Labeling, Solve Labeling, Solve Solving, and Retargeting, which I also automated in the Shogun Post script.
This video shows the un-through of my entire script:
Process?
When shown the process of cleaning up motion capture data in Shogun post, I noticed that it was the same, repeating steps in different stages.
My first thought when I started the loop of tasks was "How do I automate this?"

I found the hot keys in the software and set hot keys to the steps that I had to repeat, but then I noticed that the hot keys in shogun had the scripts associated with what each hot key accomplished available for viewing along with the hot keys.

I figured that I could combine a couple of these scripts together in order to automate the cleanup process.
Data holes in the Head, Diaphragm, Waist Belt, and Hands needed to be filled with the "rigid" method and as Motion Capture markers are named the same across name solve tasks I figured out I could just select the markers by name and fill them rigidly. The following would be the code to select the head:
selectByName "RBHD" "LBHD" "RFHD" "ARIEL" "LFHD" -type "Marker";
(It is necessary to select three or more points to do a rigid fill, and the surrounding points to make an especially successful one.)
However, combining all of the code was no easy matter. For example, the code would stop running once hitting an error. As the manual method of cleanup was "Look for hole, fill hole," on repeat I was looking for a way to have my code cycle through looking for holes and then closing them. But I didn't want the code to stop working once it was unable to find holes anymore!
I spent a while reading the Shogun HSL documentation and the solutions that I was experimenting with weren't working. The closest I got was with a code that would repeat my search-and-fill script a certain number of times. Though not an elegant solution, I was about to accept that it was my only option right until...
I found that I could fill all the holes in a selected marker's data with one line of code! 25 lines of unnecessary code instantly reduced to one. Thus is programming.

The rest of the markers not in the rigid-fill groups needed to be filled with interpolation. Interestingly, rather than being condensed to a singular line of code like the rigid fill, the interpolative hole-filling method needed about 100. This step was simple. I ran the interpolative fill on all the markers in the scene.
When I completed this code I shared it with the class and begun adding a section that would automate the Reconstructing, Auto-Labeling, Solve Labeling, Solve Solving, and Retargeting that must be done before cleanup right after opening the motion capture data.
This was simple. I found the codes and tested that they worked individually.
When I combined all of the code blocks I had to go through and rename each individual declared variable. Unlike Python, once a variable is declared it cannot be redeclared again.
Conclusion
I also added some code that set the .fbx export settings to the settings necessary for output. These settings are designated at the top of the code in case they need changing or removal. I must note that to have a successful export you need to select the objects you intend to export before you do so.
The final script in its most recent demonstration. Before running, after running, and after a small touch-up: